Creating a Recipe
In this guide, you’ll learn how to create a simple or more complex recipes for TheBrewingProject.
Keep in mind that this guide expects you to have a basic understanding of the YAML format.
TODO: Move this to a better place:
The recipes in TheBrewingProject are stored in /plugins/TheBrewingProject/recipes.yml file, and are written in YAML format.
Fundamental concepts
Section titled “Fundamental concepts”The Quality System
Section titled “The Quality System”TheBrewingProject features a quality system where every brew can turn out Bad, Good, or Excellent.
This makes the brewing process more engaging and rewarding for players.
Quality Factored Properties are configuration options that allow you to define values or behaviors that change based on the final quality of the brew.
Quality Factored Value
Section titled “Quality Factored Value”A Quality Factored Value allows a single property, such as an item’s name or a brew’s alcohol content, to change depending on the quality.
You define this by providing three values separated by slashes in the format: Bad/Good/Excellent.
Example
Section titled “Example”name: Skunked Beer/<gold>Beer/<gradient:#ff8412:#ffdf29><b>Golden Lager| Quality | Resulting Name |
|---|---|
| Excellent |  |
| Good |  |
| Bad |  |
Quality Factored List
Section titled “Quality Factored List”A Quality Factored List allows you to conditionally include items in a list, such as lore lines or potion effects, based on the brew’s quality.
You control this by prefixing list items with + symbols.
| Prefix | Applies To Quality | Description |
|---|---|---|
+++ | Excellent only | The item is included only if the brew is of Excellent quality. |
++ | Good only | The item is included only if the brew is of Good quality. |
+ | Bad only | The item is included only if the brew is of Bad quality. |
| (none) | All Qualities | The item is included regardless of the brew’s quality (the default). |
Example
Section titled “Example”lore: - +++ <gold>A rare, top-shelf beer, perfect for connoisseurs. - ++ <yellow>A decent brew, great for relaxing after a hard day's work. - + <gray>A cloudy, sluggish mixture. - <italic>This message is always included, regardless of quality.Ingredients
Section titled “Ingredients”Ingredients are the building blocks of your recipes. An ingredient can be a vanilla Minecraft item, an item from another supported plugin, or even another brew created with TheBrewingProject.
Ingredients are defined as a list under the ingredients key in a brewing step. The format for defining an ingredient depends on the type of item:
| Format | Description |
|---|---|
<item_id>/<amount> | A Minecraft item. |
<plugin_name>:<item_id>/<amount> | An item from another plugin. See Integrations page. |
brewery:<brew_id>/<amount> | Another brew from TheBrewingProject. |
Example:
ingredients: - emerald/5 # 5 Emeralds. - nexo:infused_golden_apple/2 # 2 Infused Golden Apples from the Nexo plugin. - brewery:beer/1 # 1 Beer from TheBrewingProject.MiniMessage Formatting
Section titled “MiniMessage Formatting”Every message or text in the recipe configuration is going to be formatted using MiniMessage.
Legacy formatting codes (e.g., &a, &l) are not supported.
| Format | Message |
|---|---|
| Legacy (Not Supported) | &2&lTest&rࠠff123 |
| MiniMessage | <dark_green><bold>Test<reset><#2080ff>123 |
| MiniMessage (short) | <dark_green><b>Test<r><#2080ff>123 |
For a complete guide on syntax and features, please refer to the official MiniMessage Format Documentation.
Recipe Structure
Section titled “Recipe Structure”Recipes are defined as entries in the recipes.yml file. Each recipe has an id and a set of properties that define its final product and the process to create it.
| Property | Description | Required |
|---|---|---|
steps | The instructions for brewing your drink. | Yes |
potion-attributes | Defines the appearance and metadata of the final potion item. | Yes |
brew-difficulty | How hard it should be to make the brew. | No |
alcohol | The alcohol content of the brew. The value can be anything, but will realistically be truncated between -100 and 100. This is a Quality Factored Value. | No |
effects | Potion effects applied to the player after drinking the brew. | No |
messages | Messages that can be displayed after the player drinks the brew. | No |
potion-attributes - WAITING ON MERGE
Section titled “potion-attributes - WAITING ON MERGE”Waiting on expressive-code#add-annotation-comments to get merged 🙏.
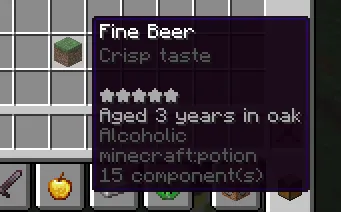
Potion attributes basically define the actual potion item that will be created as the output of a recipe.
Available properties are:
name- the name of your masterpiece. Quality Factored Valuecolor- the color of the potion. This can be either a color from theColorenum or a hex color code (without the#prefix). Quality Factored Valuelore- lore of the brew as a list of strings. Quality Factored Listglint- whether to apply a glint effect to the potion item. Default tofalse. Quality Factored Value Optionalappend-brew-info-lore- you can decide whether the extra lore should be displayed for an item, this includes for example recipe hints such as cook time, and so on. Quality Factored Value Optionalcustom-id- You can tag the brew to be made to a custom item with the following tag. Currently no checks are done on enable for this, please test each item for now when doing this. Quality Factored Value Optional
Model attributes
Section titled “Model attributes”You can change the in-game appearance of your brew item using a resource pack and custom model data.
item-model- The modern way to define custom models (1.21.4+). Recommended method. Optionalcustom-model-data- The number based legacy way. Optional
For guides on creating custom models, see these resources:
New item-model format
Old custom-model-data format
Example
Section titled “Example”potion-attributes: # ... item-model: minecraft:grass_blockThis would make your brew appear as a Grass Block:
steps - TO REVIEW
Section titled “steps - TO REVIEW”The steps property is a list of steps that the player must follow to create the brew.
The available step types are cook, mix, distill, and age.
While steps can be defined in any order, the logical flow of brewing must be respected.
Cooking and mixing must happen first in a cauldron. Once the brew is removed from the cauldron (by bottling it), it can be distilled or aged, but not cooked or mixed again.
The recommended and the BreweryX order is: cook/mix -> distill -> age.

The cook Step
Section titled “The cook Step”The cook step requires a heat source underneath a cauldron, such as a furnace or a campfire.
ingredients: (Required) A list of ingredients that are needed for the cooking step.cook-time: (Required) The required cooking duration in minutes.cauldron-type: (Optional) The type of liquid required in the cauldron. Can bewater,lava, orsnow. Defaults towater.
- type: cook cauldron-type: water cook-time: 15 ingredients: - potato/10 - nexo:pomegranate/5The mix Step
Section titled “The mix Step”The mix step is similar to cook but does not require a heat source, and does not have a cauldron-type property.
ingredients: (Required) A list of ingredients that are needed for the mixing step.mix-time: (Required) The required mixing duration in minutes.
- type: mix mix-time: 5 ingredients: - apple/3 - sugar_cane/8The distill Step
Section titled “The distill Step”Useful step for many recipes, although not required, happens in a distillery
runs: (Required)* The number of times the brew must be distilled.
- type: distill runs: 3The age Step
Section titled “The age Step”The age step requires the brew to be placed in a barrel for a specific duration.
barrel-type: (Required) The type of wood for the barrel. Accepts all vanilla wood types (e.g., oak, spruce, birch, acacia, etc.) and copper.age-years: (Required) The aging duration in TheBrewingProject years, which can be configured in the plugin’s settings.
The default is 24000 ticks, which is equivalent to 1 Minecraft day. TODO: Link to config page.
- type: age
# The type of barrel to use for aging. # Includes copper and all the wood types. barrel-type: oak
# How long the aging will take, in game days. age-years: 2alcohol - TODO
Section titled “alcohol - TODO”Exactly what it sounds like, the alcohol content of the brew.
Positive values are for alcoholic brews, while negative values can decrease player’s drunkenness (-100 to 100).
brew-difficulty - TODO
Section titled “brew-difficulty - TODO”Define how hard it should be to brew a beverage.
effects - TODO
Section titled “effects - TODO”messages - TO REVIEW
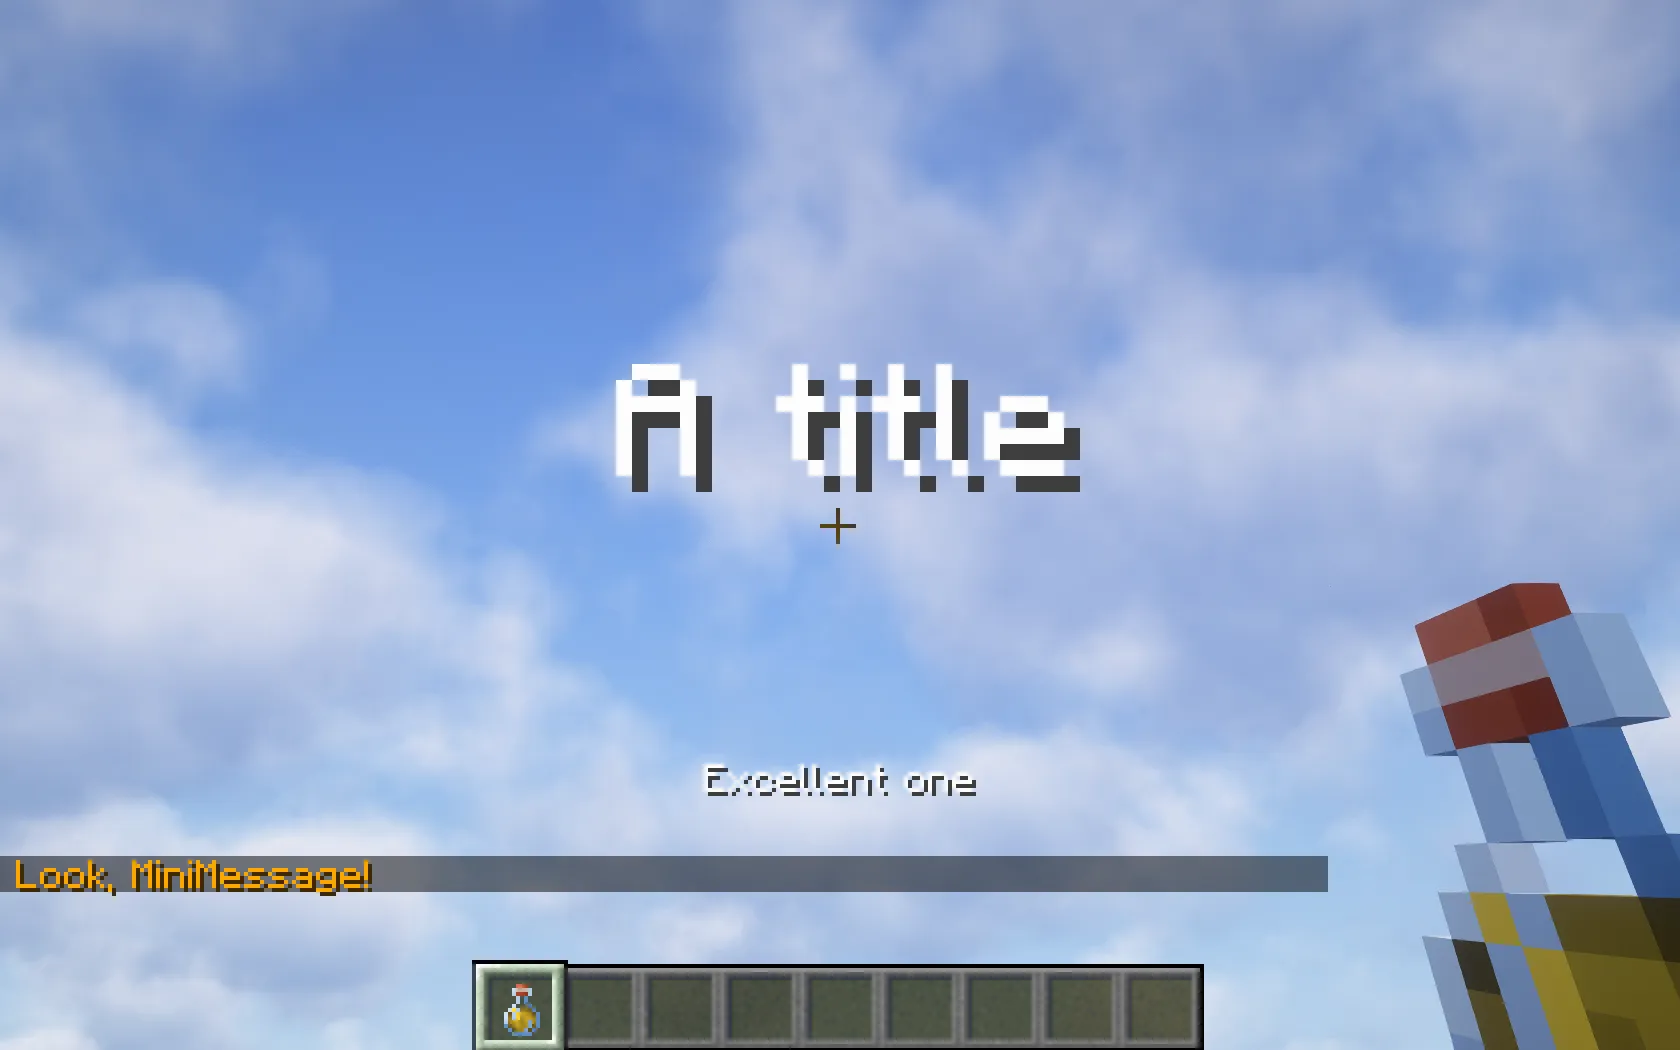
Section titled “messages - TO REVIEW”Used for specifying messages (action bar, title or chat messages) that will be displayed to the player after they drink the brew.
You can define each message as a Quality Factored Value or a simple string.
messages: # action bar message action-bar: Bad action bar message/Good one/Excellent one
# title title: A title
# chat message message: <gold>Look, MiniMessage!Here’s how the example above looks in the game (excellent quality brew):